Instant pot Cold Start Yogurt in Mason Jars
Make Homemade yogurt in a no-fail method using Instant pot Cold start or No-boil method. Its so easy and affordable to make yogurt, Greek yogurt and flavored yogurt at home using an Instant pot. I promise you wont buy store-bought yogurt anymore!

Why make homemade yogurt when its easily available in stores?
Yes, Yogurt in different flavors and styles is easily available in stores but the convenience of making homemade yogurt is entirely different. I have spent several winters buying store-bought yogurt because it was too hard to make yogurt in Seattle, but Instant pot changed my life and has always delivered great results. Here are a few reasons why you should make homemade yogurt:
- You can strain it and make your own Greek yogurt.
- Add your favorite topping and sweeteners to make it your own. Store-bought yogurts have sugar or artificial sweeteners and are often too sweet to my taste. With homemade yogurt, I add clean sweeteners like raw honey or maple syrup, so its much better for you. I also make spicy Mint yogurt drink with this.. So delicious!
- There are no extra additives added like pectin, gelatin, locust bean gum, natural flavors(who knows what those are!) etc. Its clean and perfect!
- And the last reason is, its so easy and anyone can do it!
How to make Yogurt in Instant pot?
There are two ways to make yogurt in Instant pot using Yogurt mode.
- One is a hot start method, where we boil the milk to 180F and then cooled to 110F. Then the yogurt is incubated with live cultures and set to yogurt mode for 8-10 hours. Its a bit of a hassle as you need to monitor the yogurt very closely to come to a certain temperature and then add the starter.
- Second is a Cold start method, where the yogurt and the culture/starter are whisked in together and then set in yogurt mode for 8-10 hours. This is a fool-proof method and you will have perfect results every time.
Why use Instant pot Cold Start method to make Yogurt?
As I said, its fool-proof and a no-fail method. You cannot go wrong in this method. The yogurt mode in Instant pot maintains an steady temperature to set the yogurt. You can skip the whole ordeal of boiling and cooling down to certain temperature process. Its so easy!
The only one important thing is to use a Ultra pasteurized milk. Ultra pasteurized milk is heated to high temperature and cooled down rapidly killing all the bacteria. There is no other bacteria to compete with the yogurt making process except for the lactobacillus bulgaricus (The bacteria in yogurt) and it grows during the incubation period. If you like to use regular or pasteurized milk, use the traditional boil method/ Hot-start method.
Ultra filtered milk is ultra pasteurized too. Ultra filtered milk like Fairlife will produce the thickest yogurt, almost like a Greek yogurt. If you are using regular ultra pasteurized milk, Make sure to strain it to make Greek yogurt.

Why use mason jars?
Its for the ease and its purely personal. I feel the molecular composition of the yogurt changes when its changed from one container to another. We have to switch it to storage containers once the yogurt is set anyway, so I prefer to set in mason jars and they go straight into refrigerator. I use the yogurt as is for different purposes like marinating for biryani, lassi, yogurt drinks, etc. But, if you are straining the yogurt, feel free to make it directly in the pot.
How to make the Instant pot Cold Start Yogurt in Mason Jars?
- First, let’s gather all the ingredients. I am using two types of milk here, Ultra pasteurized and Ultra filtered (Fairlife) milk, Some sterilized or cleaned Half-pint size mason jars( 8 oz. or 240 ml) and a starter whole milk yogurt like Chobani or Fage. Try to use a starter which has no preservatives or additives or sweeteners and a fresh one. I also use a 3 day old homemade yogurt as starter and that works wonderfully as well.

- Fill the mason jars almost to the rim with cold milk. Half pint jars hold about a cup(8 Oz or 240 ml) of milk.
- Add a teaspoon of cold yogurt into each jar. To make it super simple, one cup of milk needs one teaspoon of Yogurt.
- Mix the yogurt into milk thoroughly.
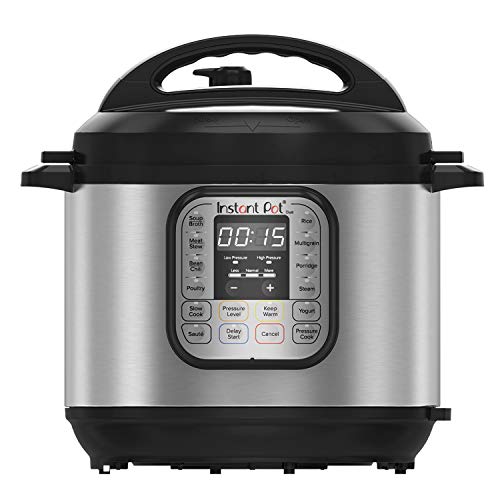
- Place the trivet in your Instant pot and add 1 cup water.

- Close the mason jars with the lids and shake it really well. Repeat the process with all the jars.
- Place the mason jars on the trivet and set the YOGURT mode on normal for 8-10 hours. I like my yogurt a little tart, so I set it to 10 hours.
- Place the lid with the valve in Venting position or use a normal glass lid.
- Once the timer is done, place the yogurt in the refrigerator. This helps the yogurt set more and become thicker. It also stops over fermenting of yogurt.

A few important tips and tricks for making Instant pot Cold Start Yogurt:
Yogurt button makes life so easy, but just in case you don’t have Yogurt button on your pot, you can still make yogurt. Unfortunately, Cold start method doesn’t work with no yogurt button. So, boil your milk in Sauté mode(normal) to 185F, turn it OFF and then cool it down to 110F. Add the starter yogurt and whisk it thoroughly. Close the lid, unplug the Instant pot and Wrap the whole Instant pot(Its still turned OFF) in a towel and keep in warm place for 8-10 hours.
Hot start and Cold start method are both great methods to make homemade yogurt and there is also slight unnoticeable difference in taste. I prefer the cold start because its super easy, the yogurt is nice and thick and there is no hassle of boiling and cooling the milk.
No, there is no need to heat up the milk. The yogurt mode on the Instant pot maintains an optimum temperature to make the yogurt.
Using Ultra pasteurized is the best option to make Cold Start Yogurt. Ultra pasteurized milk is heated to high temperature and cooled down rapidly killing all the bacteria. There is no other bacteria to compete with the yogurt making process except for the bacteria in yogurt and it grows during the incubation period. If you like to use regular or pasteurized milk, use the traditional boil method/ Hot-start method.
Ultra filtered milk (and ultra pasteurized) like Fairlife will produce the thickest yogurt, almost like a Greek yogurt. It has highly concentrated protein and calcium levels and less sugars which help with a fool-proof yogurt making process. If you are using ultra pasteurized milk, Make sure to strain it to make Greek yogurt.
Fairlife 2%, Organic valley Grass milk (2% and fat free), Maple hill organic ultra filtered 2% and Maple hill Grass-fed Ultra pasteurized milk. The starters used were Chobani whole milk yogurt and Grace harbor Creamery Plain yogurt and then, the homemade yogurt as starter for the next batches of yogurt.
8-10 hours is the ideal time. I set my yogurt for 10 hours in winters and 8 hours in summer. It also depends on how tart or sweet you like your yogurt. Set the yogurt mode on normal for 10 hours for a tart yogurt.
Typically, as soon as you can! I transfer the yogurt jars to my refrigerator immediately after the yogurt is done. But, its okay to leave it in the instant pot for a couple hours after the cycle ends. Yogurt is a form of preservation of milk in olden days, so its totally okay to leave it at room temperature for a few hours. 
Yogurt will last for up to a week in the refrigerator. After that, the bacteria starts to weaken, so do not use a week old yogurt as a starter. You will know your yogurt has gone bad if it smells sour or develops pink mold on top.
Strain it using a cheesecloth or muslin cloth or yogurt strainer after its completely set in the refrigerator.
I make flavored yogurt for my kids all the time. Just mix in honey/maple syrup and your favorite fruit puree. We like mango, strawberry and peach flavored yogurts.
Yogurt doesn’t set sometimes because the starter might have been weak, Try to use a fresh starter or 2-3 day old homemade yogurt starter. Another reason could be that the yogurt cycle is shorter, try to ferment it for couple more hours. Add more fresh yogurt and set the yogurt mode for 3-4 more hours.
Your yogurt is sour because you might have left in yogurt mode a bit longer than needed. Or added more starter than needed. You can always save it next time by adding less starter and fermenting it for less time.
Yes! You can use any sterilized Instant pot safe bowl like a pyrex bowl and make yogurt using cold start method. This method is fool proof.
Instant pot Cold Start Yogurt

Easy peasy Cold Start yogurt in Instant pot.
Ingredients
- 1 cup Ultra pasteurized whole milk (8 ounce or 240 ml)
- 1 teaspoon Whole milk Greek yogurt (with live cultures) or 1 teaspoon homemade yogurt from your last batch
Instructions
- Fill the half pint mason jar almost to the rim with cold milk.
- Add a teaspoon of cold yogurt to your milk. Mix the yogurt into milk thoroughly (seal the jar properly and shake it thoroughly).
- Place the trivet in your Instant pot and add 1 cup water. Place the mason jar on the trivet and set the YOGURT mode on normal for 8-10 hours.
- Place the lid with the valve in Venting position or use a normal glass lid.
- Once the timer is done, place the yogurt in the refrigerator. You can strain the yogurt for a more thicker yogurt and store in the refrigerator for up to a week.
Notes
- The ingredients above are for 1 cup of yogurt only. Use as many mason jars as you like and can fit in your Instant pot.
- Ultra pasteurized and Ultra filtered (Fairlife) milk work the best for cold start yogurt. If you like to use regular or pasteurized milk, use the traditional boil method/ Hot-start method.
- Try to use a starter which has no preservatives or additives or sweeteners and a fresh one. I also use a 3 day old homemade yogurt as starter and that works wonderfully as well.
- If your yogurt is not set in 8 hours, set it for couple more hours.
- Do not add any sweeteners or fruit preserves to your milk before making yogurt. I prefer to add them later after the yogurt is set.
- Strain the yogurt using a cheesecloth or muslin cloth or yogurt strainer after its completely set in the refrigerator.
- I added lots of tips and tricks to make easy yogurt in my post above. Please refer above if you have any questions.
Recommended Products
As an Amazon Associate and member of other affiliate programs, I earn from qualifying purchases.


I tried to cover all the questions I could think of, please refer above for all the tips and tricks. If you still have questions, leave a comment below or shoot me an email at blissfulbitesbytay@gmail.com, I am happy to help!
Pin it for later:
Please enter your name and email address below to subscribe!
Note: As an Amazon Associate I earn from qualifying purchases.


Hi,
I’ve been making yogurt in IP for the last two years. I use hot milk (boiled and cooked to warm) milk to make yogurt in the IP. I do not add water to the IP, and neither do I close the container (in which the milk is kept). I shut the IP using the IP lid.
My questions are:
1. Do you need to add water in the IP?I felt doing this made the yogurt more sour.
2. Do you need to close the container in which the milk is kept (like the mason jar you use?)
Thanks
Hi Jaya,
The cold start method is bit different to get used to, I understand. To answer your questions:
1. Use water only if you doing Pot in pot method, which I assume you are. And yes, I would suggest to add water in the IP. The water creates a nice water bath kinda atmosphere instead of just getting the bottom of the pot hot.
2. Again, its not needed. But closing the container avoids the condensation on the lid dripping into yogurt. And it also helps the bacteria in the yogurt to grow faster and without any competition.
Hope this helps! Please let me know if you have any more questions. Happy to help!
Just found your instant pot yogurt recipe here using the half pint mason jars. I just made my first ever homemade yogurt last week and LOVED it– but I did the yogurt in the pot liner and the recipe had a can of sweetened condensed milk in it which I really liked (I like mine sweeter). Does this method (using the small jars) work if I add sweetened condensed milk to the recipe? Is so, couldn’t I premix the milk and starter mixture with the sweetened condensed milk in a bowl first (thoroughly blended of course) and then fill and process the jars on the yogurt setting? It would make it easier than blending it jar by jar. Thanks!….
Loretta
Hi Loretta,
I apologize for the delay. Yes, you can definitely do that! It’s very common and tried and tested by several people. Just mix up well in a big mixing bowl or measuring cup and pour into jars.
Hi Loretta,
I just started using mason jars for yogurt. I let them cook in a pot with a Sous vide stick.
My question is about the lids. The water in the pot reaches to about an inch or two under each lid. I then cover the pot with some silicone placemats to keep the water from evaporating. I currently have 3 jars incubating and so far 2 of the 3 jars are thickening nicely and the third looks like it’s mostly water with the yogurt floating on top. I poured the same milk+starter mixture into each jar, so it isn’t as though the ingredients differ. The ONLY thing I noticed was that the jar with the least amount of yogurt had a loose lid. Not crazy loose, but the other two were sealed tight and this one was loose and I could hear the hiss of air escaping. Could this be the issue? I tightened it and am going to wait to see how they turn out, they still have several hours. I just find it strange that people make yogurt all the time in like, a BOWL with a towel on top, and their yogurt comes out great.. why would a lid not being tight be an issue? Just wondering if you have insight.
Thanks!
Elizabeth
Hi Elizabeth,
I have made yogurt in open Bowls several times, so loose lid is definitely not an issue. What temperature are you setting in sous vide mode? Do you have yogurt mode?
Hi! I’ve been an IP user for years and I love yogurt so I think I finally want to get around to trying this method!
Question — I just want to be sure, do you run the yogurt setting with the mason jar lids on or off? I just don’t want anything to explode! 🙂
Great question! You can keep the lids on, so the condensation on the lid doesn’t go in the yogurt. Yogurt setting doesn’t build up pressure but maintains the temperature inside the pot. Trust me, it won’t explode, I promise!🙂
I’m happy to learn that the lids should be on the jars. That makes me wonder – could I stack a second layer of jars on top or does each yogurt container need to be in the water bath?
Yes, absolutely! You can stack as many as you want. The yogurt doesn’t need a water bath, it needs a warm setting for the bacteria to activate and the yogurt to set. Happy yogurting!